Technical Guide: Reline and Scanning Protocols for Digital Final and Copy Dentures
Using a reline material inside a try-in or an existing denture is an excellent way to capture precise tissue fit and vertical dimension. However, transferring this analog data into a flawless digital workflow requires specific handling.
This guide covers material cleanup, scanning strategies, and the essential clinical data required for a successful final prosthesis.
1. Material Cleanup and Tooth Morphology
Excess reline material (such as light-body PVS) frequently flows over the teeth during the impression process. If left unchecked, this excess distorts the digital tooth shapes, resulting in an inaccurate bite registration and poor aesthetics.
Step-by-Step Cleanup Protocol
-
- Locate flashes: Inspect the facial, lingual, and occlusal surfaces of the denture teeth.
- Use a sharp blade: Use a #11 scalpel blade to carefully slice away excess material.
- Clear the margins: Cut the material cleanly at the cervical margins (gingival lines) of the teeth.
- Expose anatomy: Ensure 100% of the original tooth morphology is completely visible.
- Check embrasures: Remove any material trapped in the interproximal spaces between teeth.
2. Scanning Strategy for High-Quality Data
Laboratory or intraoral scanners can struggle with the transition between the reflective denture acrylic and the matte reline material.
Best Practices for Scanning
-
- Apply scan spray: Use a thin, uniform layer of titanium dioxide scan spray if the reline material or acrylic is shiny.
- Intraoral scanning path: Scan the tissue surface first, roll over the borders to the facial wall, and finish on the occlusal surfaces.
- Laboratory scanning: Use a Blu-Tack or putty jig to secure the denture, scanning the intaglio (tissue side) and arches separately before aligning them.
- Capture the borders: Ensure the entire functional depth and thickness of the captured vestibule is scanned without gaps.
3. Essential Data Needed for the Final Prosthesis
To design a highly functional digital denture, the design software requires a complete data package. Ensure you gather and export all of the following components:
The Complete Digital Data Package
-
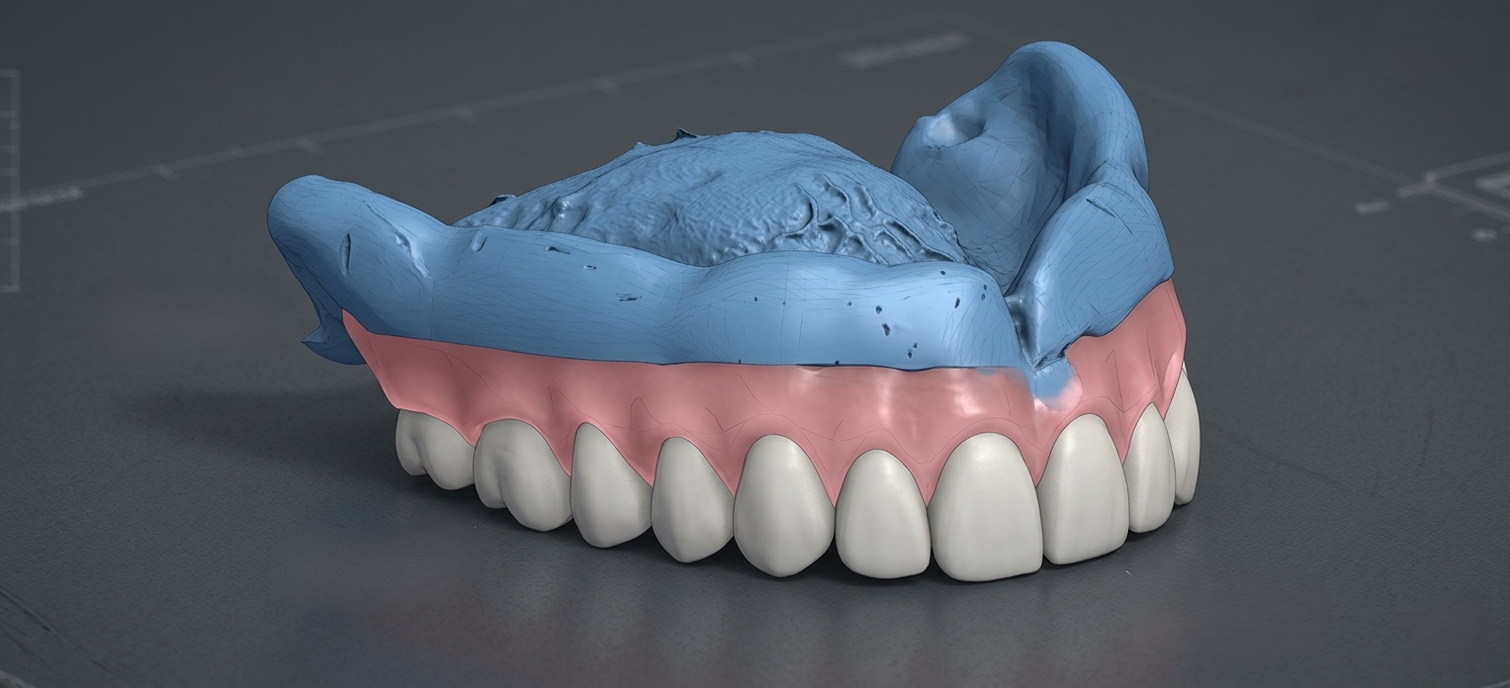
- Intaglio surface: Highly detailed scan of the reline material representing the true tissue topography.
- Peripheral borders: Fully captured, rounded borders to establish the necessary peripheral seal.
- Opposing arch: A matching scan of the opposing dentition or opposing relined denture.
- Bite registration: A scan of the patient in maximum intercuspation (centric occlusion) with the relined dentures in the mouth.
- Lip lines and midline: Digital or physical marker data indicating the midline, canine-to-canine width, and high smile line.
- Clinical photos: Full-face and profile views of the patient smiling with the try-in to assist the lab designer with facial aesthetics.