Digital Denture – CAD Design

$25.00

SKU: D-Digital Denture Design Categories: , ,

Description

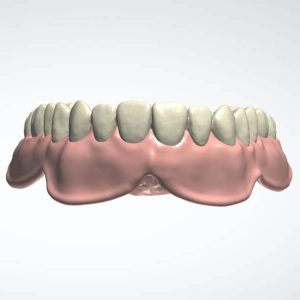
The Digital Denture – CAD Design is an advanced dental solution for patients looking for a secure and comfortable fit. This new technology allows for precise, custom-made dentures to be manufactured with a computer-aided design. Using this cutting-edge technology, the dental professional is able to create dentures that are tailored to the patient’s exact specifications and fit perfectly in the patient’s mouth.

The Digital Denture – CAD Design is a perfect solution for those seeking a comfortable, secure, and customized denture. The dentures created with this technology are lightweight and extremely durable, making them a perfect choice for long-term use. Additionally, this procedure allows for adjustments to be made quickly and easily, ensuring that the denture stays in top condition for years to come. So, if you’re looking for a comfortable, secure, and customized denture, look no further than the Digital Denture – CAD Design.

All denture teeth listed are sole copyright to their respectful manufacturer and are not affiliated with CAE Dental.

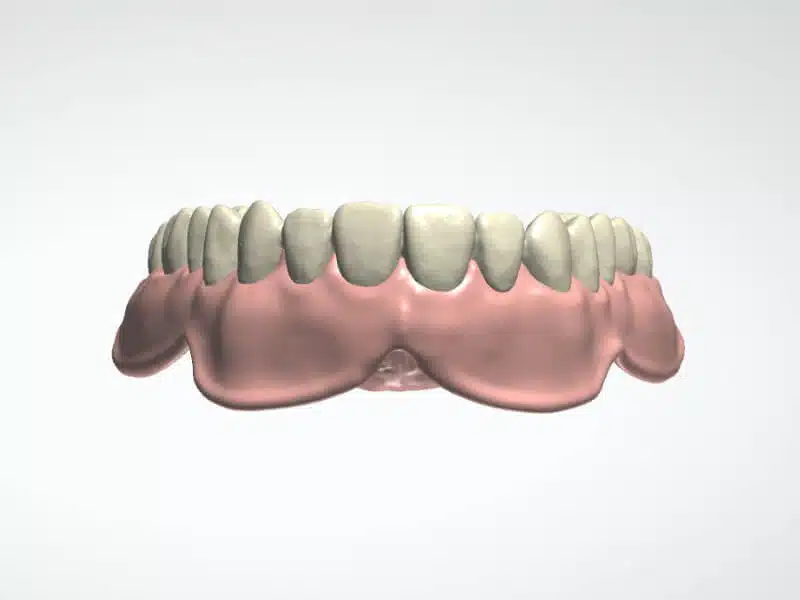
Monoblock / Try-in Denture: is 1 solid piece used for checking the accuracy of tooth placement and setup.

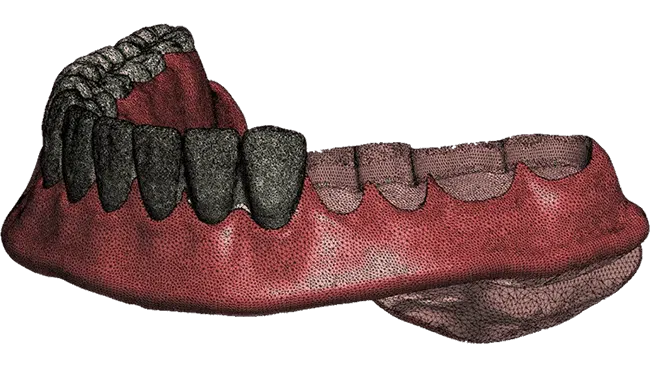
Split-File Denture: has the teeth and base as separate pieces used for either 3d printing or milling for fabrication.

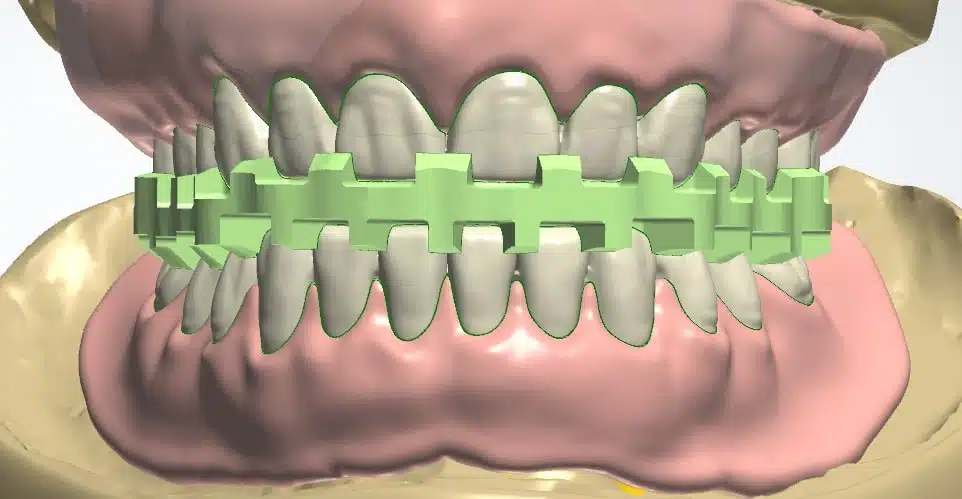
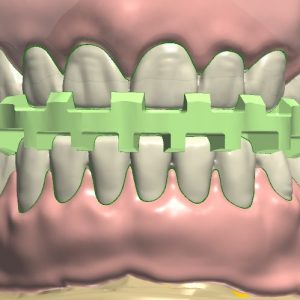
Digital Denture Cut Guide: is used for placing premade denture teeth in sockets and then processing to final.

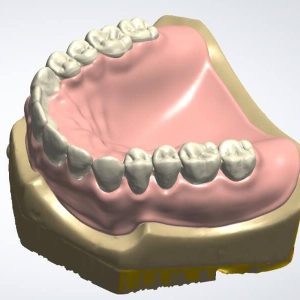
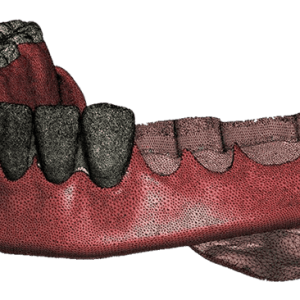
Copy Denture: is a duplication of Patients’ current denture either in a Monoblock type or Split-File type setup.

Digital Denture Reline: is the same as a Copy denture but reline/wash material has been placed inside denture prior to scanning.

Please login to post questions

Question:

If we had you make a Monoblock denture and everything looks good, do we need to make a new order to have the Split-File version of the denture?

Answer:

No if we designed the original denture, you do not need to place a new order. We can convert the monoblock denture to a split-file denture or vice versa and there is a fee of $15 per arch. Just put in the notes of the order that you want the denture converted and we will convert it.

Question:

Do you offer milling file for dentures?

Answer:

Yes just click Yes in the selection "Milling the Denture?" and we will provide the extra information needed.

Question:

Are your designs exocad or different cad software?

Answer:

No we design using 3shape since it provides the most options for digital denture choices.

Question:

What thickness should i select for the denture design?

Answer:

It really depends on the printing / milling equipment and materials you are using for the fabrication. We would recommend reaching out to material supplier for recommended settings

Question:

Is the Nobildent teeth the same as Nobilcam?

Answer:

The digital molds were from Nobilium-CMP but they closed up and their tooth line was bought out by Vinicsmile. They seem to still be using the brand name but we cannot confirm if the are the exact same molds and size as these. We would recommend choosing a different mold line if you are wanting to use physical carded and they are from Vinicsmile and not from Nobilium.

Question:

How many scans do you need?

Answer:

For dentures, we recommend one upper and one lower scan. If these are not in the articulated plane, please include one bite scan for arch alignment. Predesign or waxrim scans are also helpful. When uploading, use as few scans as possible. Multiple uploads of the same scan with different names cause confusion and delays the design process.

Question:

how do i send you a new scan of bite for a case you designed?

Answer:

If a new bite is created from try-ins, treat the case as a new case and create the order as usual. If the denture teeth mold used is still the same, you can either reference a previous order number or make the same selections when creating the order. Scan Upload Instructions: Bite Issue Only: Include the original try-in designs. Bite scan to match the arches to the bite. For a single arch, include: The try-in design Scan of the opposing arch Other Adjustments: If significant adjustments were made to the try-in, scan the entire try-in so the designer can adjust the design accordingly. For changes in midline, smile line, tooth size, etc.: If you have a color scanner, draw/make marks on the try-in before scanning. If no color scanner, grind notches into the try-in to accomplish the same task.

Question:

I had you make an upper denture and the patient likes it and now wants to do an Immediate lower, how do i proceed?

Answer:

If you need to add a lower immediate to your original order without changing anything else, you have two options: 1. Click the redesign button on the existing order and specify your requirements in the notes. 2. Place a new order with the necessary changes and mention the old order to reference in the notes section.

After submitting the order, you will have access to upload the scans/files for a Digital Denture - CAD Design

Please include all the necessary/vital information pertaining to the design including Midline, Vertical Plane, Proper bite, Mold Selection, Setup, etc. A full redesign fee will be incurred if it is not and it’s asked to be redesigned. If the case is designed with the given information and that required information is changed after being designed there will be a partial redesign fee incurred for the case.

Patient Information

Please input the name of the patient or case # for record. (Letters, Numbers, and Spaces are the only allowed format)
The typical turnaround time is 24-48 hrs. but not guaranteed. Cutoff Time is 3pm EST, if case is submitted after this time please add an extra day to the return time.
If you have multiple scans that need to have meshed together or scans are extremely bad and need to be cleaned up and smoothed, please select the option below.

Denture Design Information

While we strive to return the design within the requested timeframe, unforeseen circumstances may prevent us from guaranteeing this. Rest assured, you will not be charged any extra fees if the files are not returned on time.
Have we designed the Original Monoblock Denture and now you need it converted to a Split-file case? Please note that this option does not allow for new scans or design changes
Please enter the order# or patient name that needs to be converted.
See Information about Denture Types below.
Please select a denture tooth company for the tooth mold used in your prosthesis fabrication. We offer a wide selection of denture tooth CAD options and regularly add new ones. If you prefer us to choose the mold and it doesn’t meet your expectations, a redesign fee will apply for changes.
Please choose the actual upper denture tooth mold used.
Mold guide here: Myerson Kenson Mold Chart
Please choose the actual upper denture tooth mold used.
Mold guide here: Myerson Kenson Mold Chart
Please choose the actual upper denture tooth mold used.
Mold guide here: Ivoclar Blueline Mold Chart
Please choose the actual upper denture tooth mold used.
Mold guide here: Ivoclar Blueline Mold Chart
Please choose the actual upper denture tooth mould used.
Mould guide here: Dentsply Portrait Mould Chart
Please choose the actual lower denture tooth mould used.
Mould guide here: Dentsply Portrait Mould Chart
Please choose the actual upper denture tooth mould used.
Mould guide here: Dentsply Genios Mould Chart
Please choose the actual upper denture tooth mould used.
Mould guide here: Dentsply Genios Mould Chart
Please choose the actual upper denture tooth mold used.
Mould guide here: Kulzer Mondial Mould Chart
Please choose the actual lower denture tooth mold used.
Mould guide here: Kulzer Mondial Mould Chart
Please choose the actual upper denture tooth mould used.
Mould guide here: Nobilium Nobildent Mould Chart
Please choose the actual lower denture tooth mould used.
Mould guide here: Nobilium Nobildent Mould Chart
Please choose the actual upper denture tooth mould used.
Mould guide here: Vertex Quint Mould Chart
Please choose the actual upper denture tooth mould used.
Mould guide here: Vertex Quint Mould Chart
Please choose the actual upper denture tooth mould used.
Mould guide here: Yamahachi New Ace Mould Chart
Please choose the actual upper denture tooth mould used.
Mould guide here: Yamahachi New Ace Mould Chart
Settings that create more than a standard denture setup.
How thick do you want the overall Denture Base to be? ( 2.5mm is default )
Do you request a Post Dam on Upper Denture?
Does this need to fit to Bar already designed? ( Scan of Bar required to fabricate )
Does this need to fit into Temporary Abutments/Access Holes? ( Scan of Temp. Abutments required to fabricate )
Guide used to help aide in the positioning of teeth properly within the arch
Select below if you need Support Bar(s) for post curing ( Carbon Recommended )
If milling the denture we will provide the PTS file for the Gingival Surface as well as add a drill compensation for tooth sockets.
Do teeth need to be digitally extracted from scan ( Immediate Denture )?
Do you want the Patient Name / Case # Engraved in the Denture Base?
Engraved( Inset of Base) or Embossed ( Outset of Base)
If you want to change the default font settings
How far Inset/Outset do you want the text to be? Please be aware if you pick a default Denture Base thickness of 2.5mm and then make the the text depth more than 1mm it can cause issues with printing. Min. value (0.2mm) to Max. Value (2mm)
How large do you want the text to be? If there is not enough room or the name is very long, the font will be sized down to fit. Min. value (1mm) to Max. Value (5mm)
Input how you want the name to say on the denture

Implant Bar Add-On

If you would like add a Implant Bar design
Select the Type of Implant Bar you need. If it needs to be customized further please include a detailed description.
How would you like the end of the bar shaped
If you need to add attachments to the bar, please select the type you require and indicate where you would like them placed. Please note that this process will create a hole for inserting the attachment, but will not include the attachment itself
Please select the amount of attachments you need added to the implant bar
Please indicate where you would like the attachments placed.
Select the Type of Implant Bar you need. If it needs to be customized further please include a detailed description.
How would you like the end of the bar shaped
If you need to add attachments to the bar, please select the type you require and indicate where you would like them placed. Please note that this process will create a hole for inserting the attachment, but will not include the attachment itself.
Please select the amount of attachments you need added to the implant bar
Please indicate where you would like the attachments placed.
Please specify the scanbody type(s) being used. Note that it should be a Multi-Unit Abutment (MUA) scanbody and not a standard scanbody typically used in standard crown and bridge (C&B) abutment cases. For further details, please consult your scanbody manufacturer.

Secondary Implant Bar Add-On

If you would like add a Secondary Implant Bar design
Determines the thickness of the material, you can also tell us what your preferred thickness of the material you would like.
If you would prefer to have your thickness set to a certain amount, please indicate below.
Additional options to add to the bar.
Would you like to apply a surface stippling to the secondary bar.
Give a detailed explanation of how you want the addons applied or any additional information pertaining to the secondary implant bar.

Model Add-On

If you would like a model design added to the order
Minimum thickness value of the model
If you would like side drain holes added please indicate.
Would you like case number or name placed on the model
Engraved( Inset of Base) or Embossed ( Outset of Base)
Input what you want added to the model

Additional Information

Add any additional information pertaining to the case.
Product total
Options total
Grand total